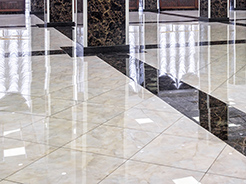
Limestone tiles exude a unique, timeless elegance, bringing a touch of nature indoors with their subtle, organic beauty. Like all natural stone, limestone requires proper maintenance and occasional polishing to retain its lustre and resilience. The process of polishing limestone tiles is both an art and a science, blending careful preparation, methodical steps, and attention to detail. Whether you’re a homeowner seeking to revive a tired floor, or a professional preparing for a new project, understanding the polishing process is essential for achieving a flawless finish.
The Polishing Process for Limestone Tiles: Step by Step
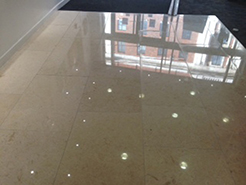
With preparation complete, the true work of polishing begins. The objective is to gradually smooth the surface, closing the stone’s pores and enhancing its shine.
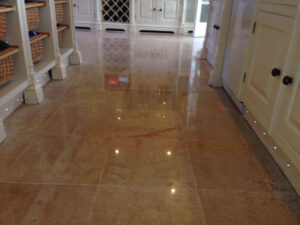
 Step 1: Honing the Surface

Honing is the process of smoothing the stone with progressively finer abrasives. This step removes minor scratches, surface etching, and restores the tile’s uniformity.
- Equipment: Use a variable-speed floor machine fitted with diamond-impregnated pads, starting with a coarser grit (often 400 or 800 grit for limestone).
- Technique: Work in small, manageable sections. Move the machine in overlapping passes to ensure even abrasion. Keep the surface slightly damp to prevent overheating or dust generation.
- Progression: Gradually move to finer grits (1500, then 3000), wiping the surface clean between each pass. Each step should remove the scratches left by the previous grit.
Step 2: Polishing with Special Compounds
Once the surface is smooth and consistent, it’s time to polish:
- Polishing Powders: Sprinkle a small amount of a limestone-safe polishing powder onto the surface. These powders typically contain mild abrasives and chemicals that react with calcium carbonate, producing a glossy finish.
- Buffing: Using a white nylon pad or a soft cloth attached to the machine, buff the powder into the surface in circular motions. The stone will gradually develop a natural sheen.
- Rinsing: After polishing, thoroughly rinse the area with clean water and remove all residues. Dry the tiles with a soft towel or mop.
Step 3: Optional – Crystallisation
For a higher-gloss finish, some professionals use a process called crystallisation:
 Crystallising Agents: Apply a chemical crystalliser formulated for limestone.
- Buffing: Buff the surface with a steel wool pad using the floor machine. This process creates a microfilm on the surface, enhancing gloss and slightly improving resistance to scratches.

It is important to note that crystallisation is usually optional for limestone and should be performed with caution, as excessive chemical use can damage the stone over time.
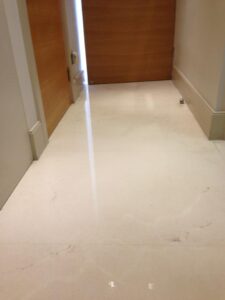
Step 4: Sealing the Limestone
Polished limestone, while more resistant to stains than unpolished stone, is still porous and benefits from sealing.
- Product Selection: Choose a high-quality, penetrating stone sealer appropriate for limestone. Avoid topical sealers that create a film on the surface, as these can alter the appearance and make future maintenance difficult.
- Application: Apply the sealer evenly with a soft cloth or roller, following the manufacturer’s instructions closely. Allow it to penetrate, then buff away any excess. Let the surface cure fully before replacing furniture or allowing heavy foot traffic.
We specialise in deep cleaning and polishing stone floors. If you would like to request a stone polishing quote please call today on 07715 567685.
I am a time-served carpet cleaner, stone floor restoration specialist, leather restorer and upholstery cleaner serving Lancashire. I pride myself on using only the best products and state of the art machinery to provide exceptional finishes without exception.

Leave A Comment